Raspberry Pi Printing
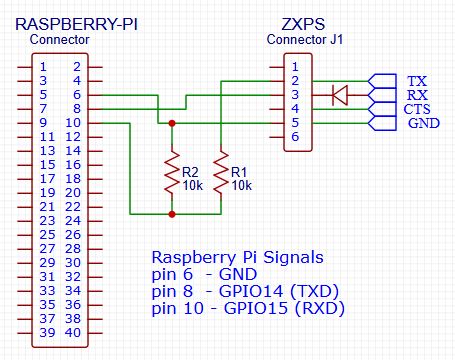 |
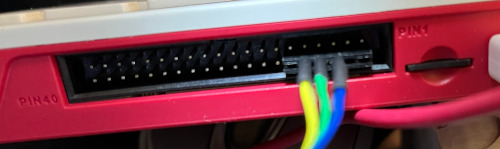 RPi 400 Connector serial cable wiring 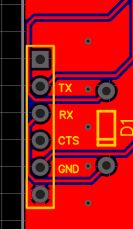 ZXPS J1 on PCB ZXPS J1 on PCB |
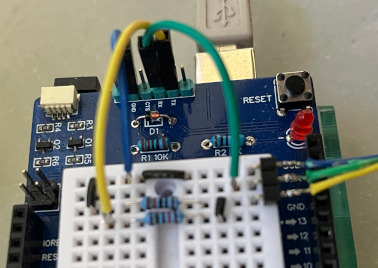 Example using ZXPS solderless breadboard to build 10K voltage divider on ZXPS 5Volt TX output to accomodate 3.3 Raspberry RX input. Signals to PRi travel on 3-wire cable at the right. |
ABOVE: The hardware connection between a Raspberry Pi and XZPS for serial port printing
BELOW: The comments reprinted from the Github text_printer.ino Arduino sketch for configuring a Raspberry Pi pinter port.
The file gets installed in Arduino/libraries/ZXPrinterLibrary-main/examples/text_printer/text_printer.ino
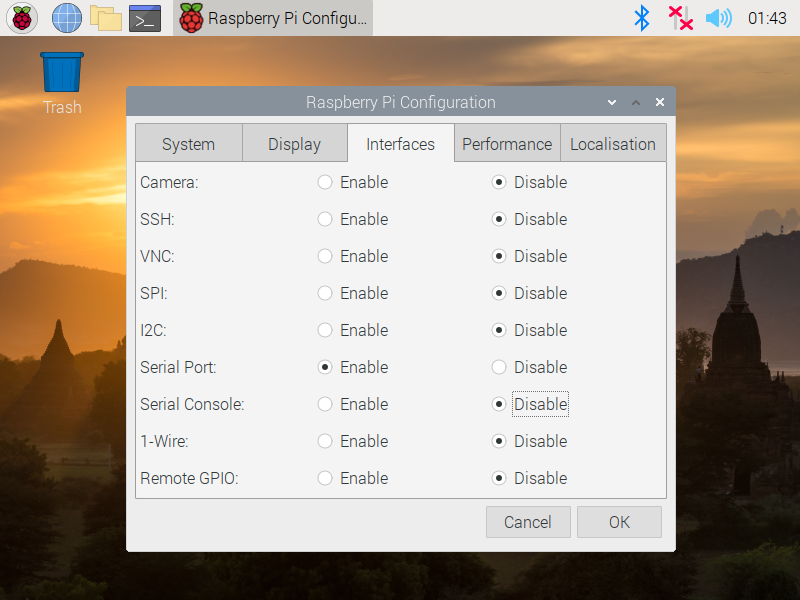
On Raspberry Pi:
1. enable the Serial Port and disable the Serial Console. On the desktop...
- click top left Raspberry icon->Preferences->Raspberry Pi Configuration->Interfaces
- reboot
2. connect the Raspberry Pi to the ZXPS shield.
- connect pin 6 (Ground) to the ZXPS shield serial header GND
- connect pin 8 (UART TXD) to the ZXPS shield serial header RX
- connect pin 10 (UART RXD) to the ZXPS shield serial header TX through a voltage divider
_____ _____
ZXPS TX -----|_____|----o-----|_____|------ GND
10K | 10K
Pi pin 10 --------------+
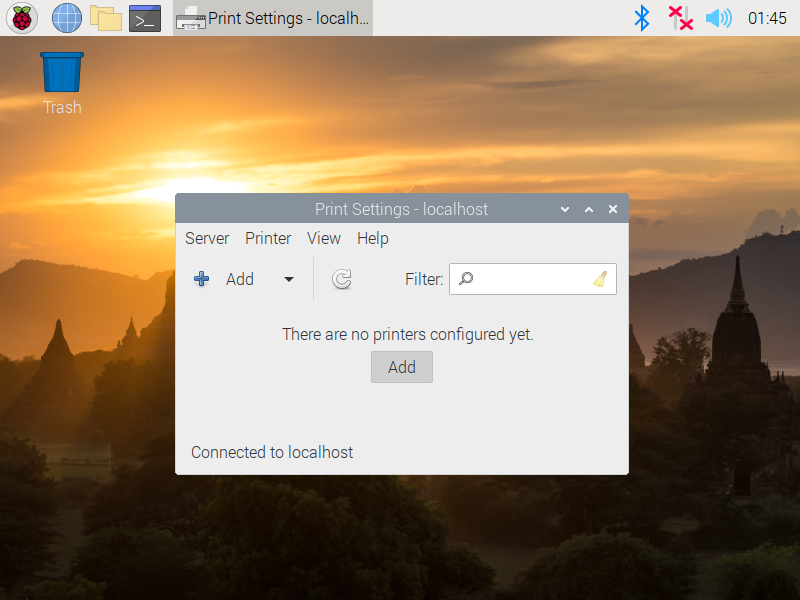
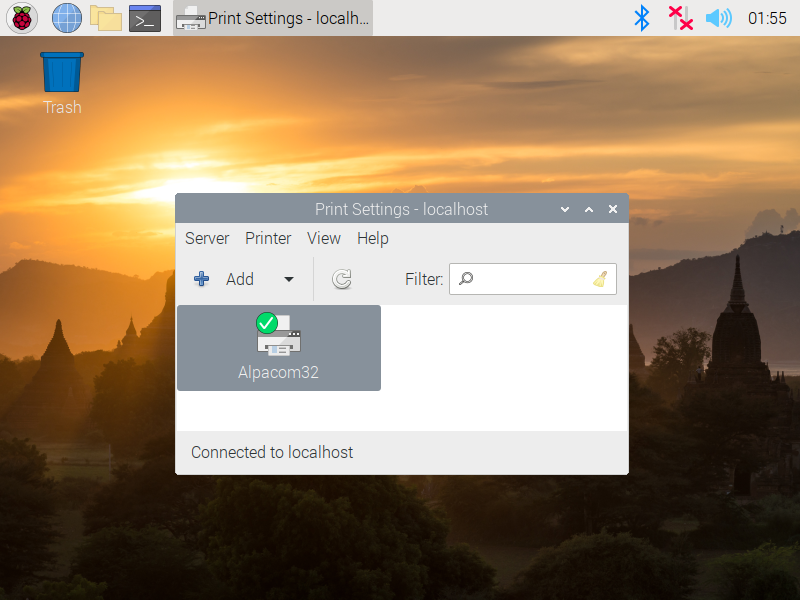
3. add a text printer. On the desktop...
- click top left Raspberry icon->Preferences->Print Settings
- click "Add"
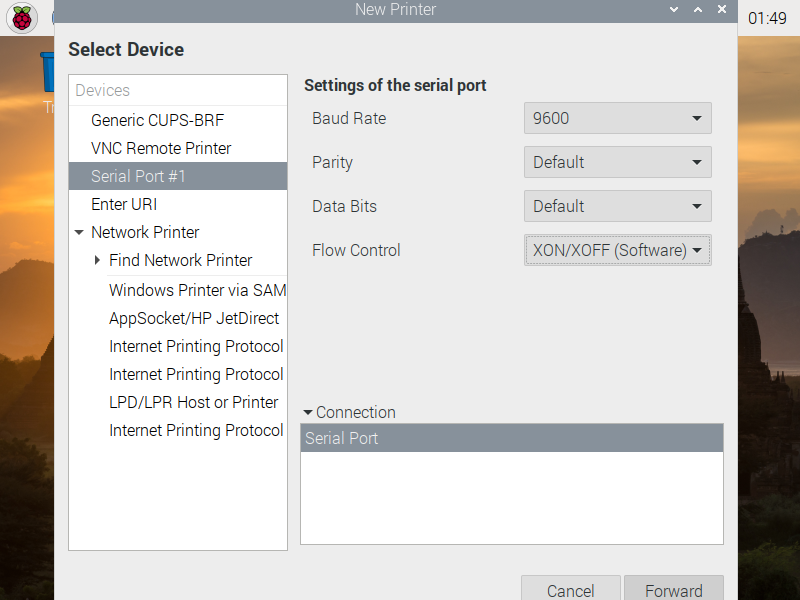
- click "Serial Port #1"
- for "Baud Rate" select "9600"
- for "Flow Control" select "XON/XOFF (Software)"
- click "Forward"
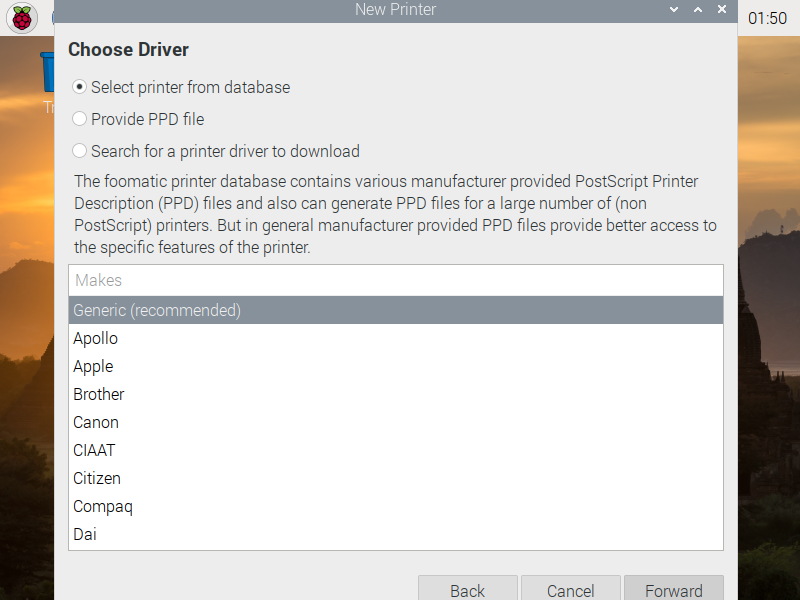
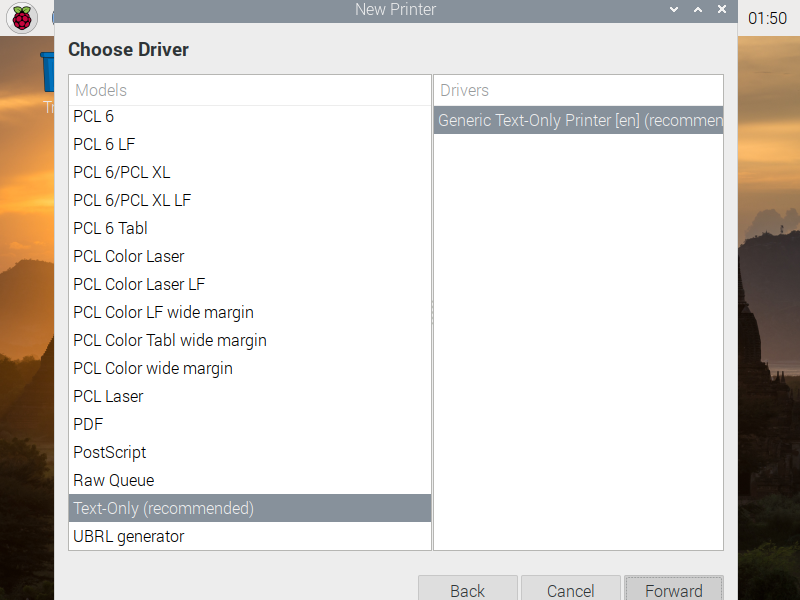
- select "Generic (recommended)"
- click "Forward"
- select "Text-Only (recommended)"
- click "Forward"
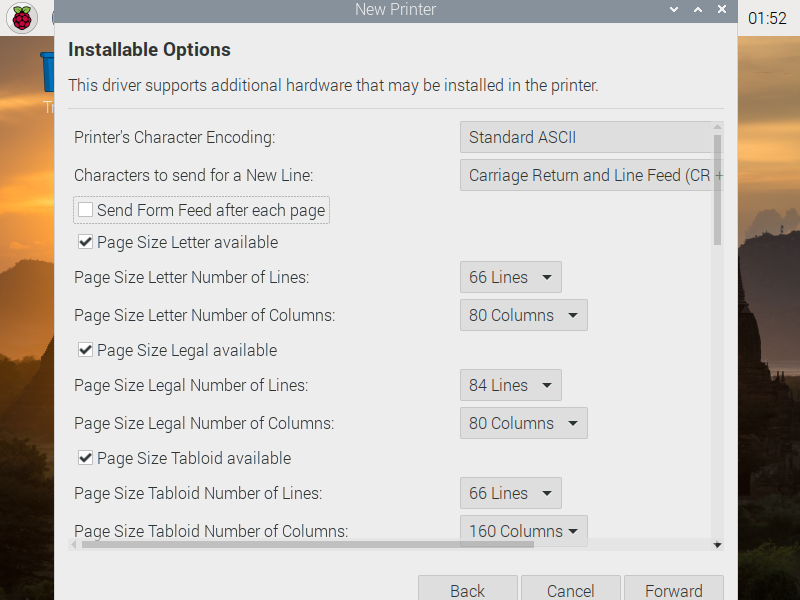
- disable "Send Form Feed after each page"
- click "Forward"
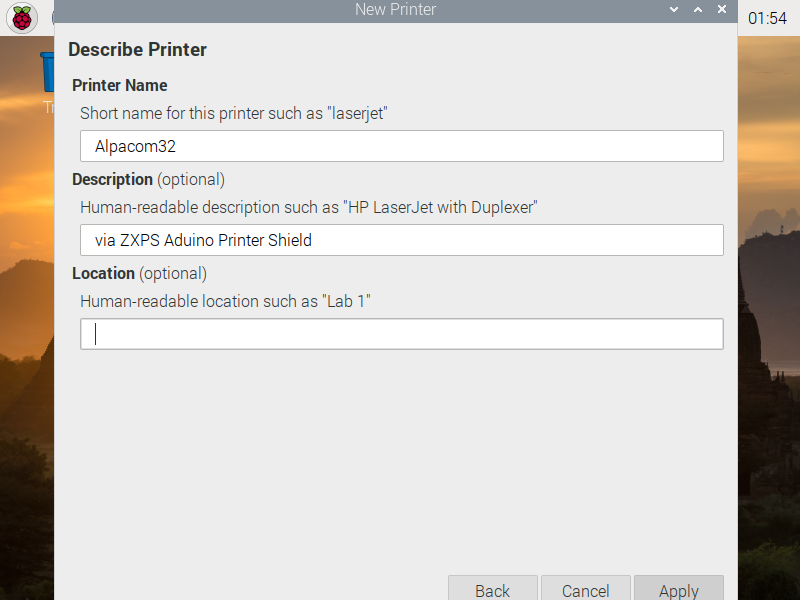
- enter a "Printer Name" and "Description"
- click "Apply"
- if the new printer doesn't have a geen tick, right click the printer and "Set As Default"
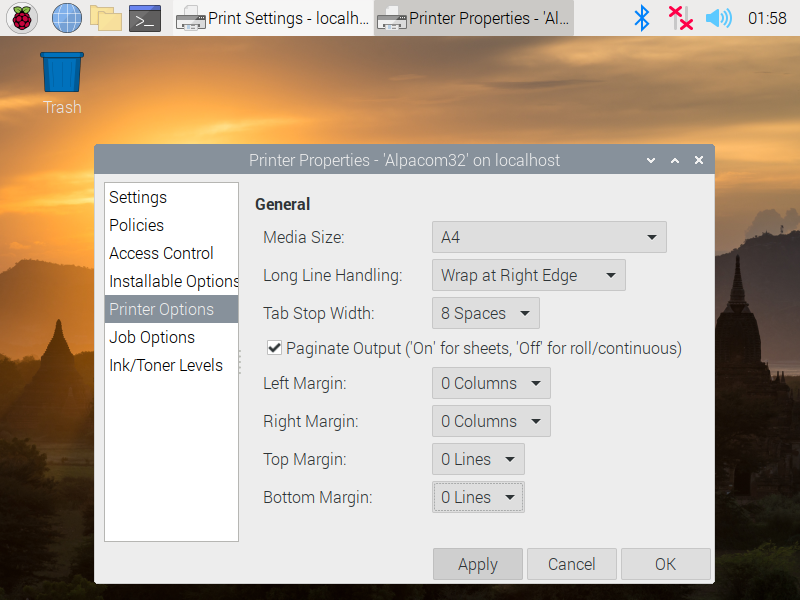
- right click the printer->Properties
- select "Printer Options"
- set the "Left Margin", "Right Margin", "Top Margin", and "Bottom Margin" to 0
- Click "OK"
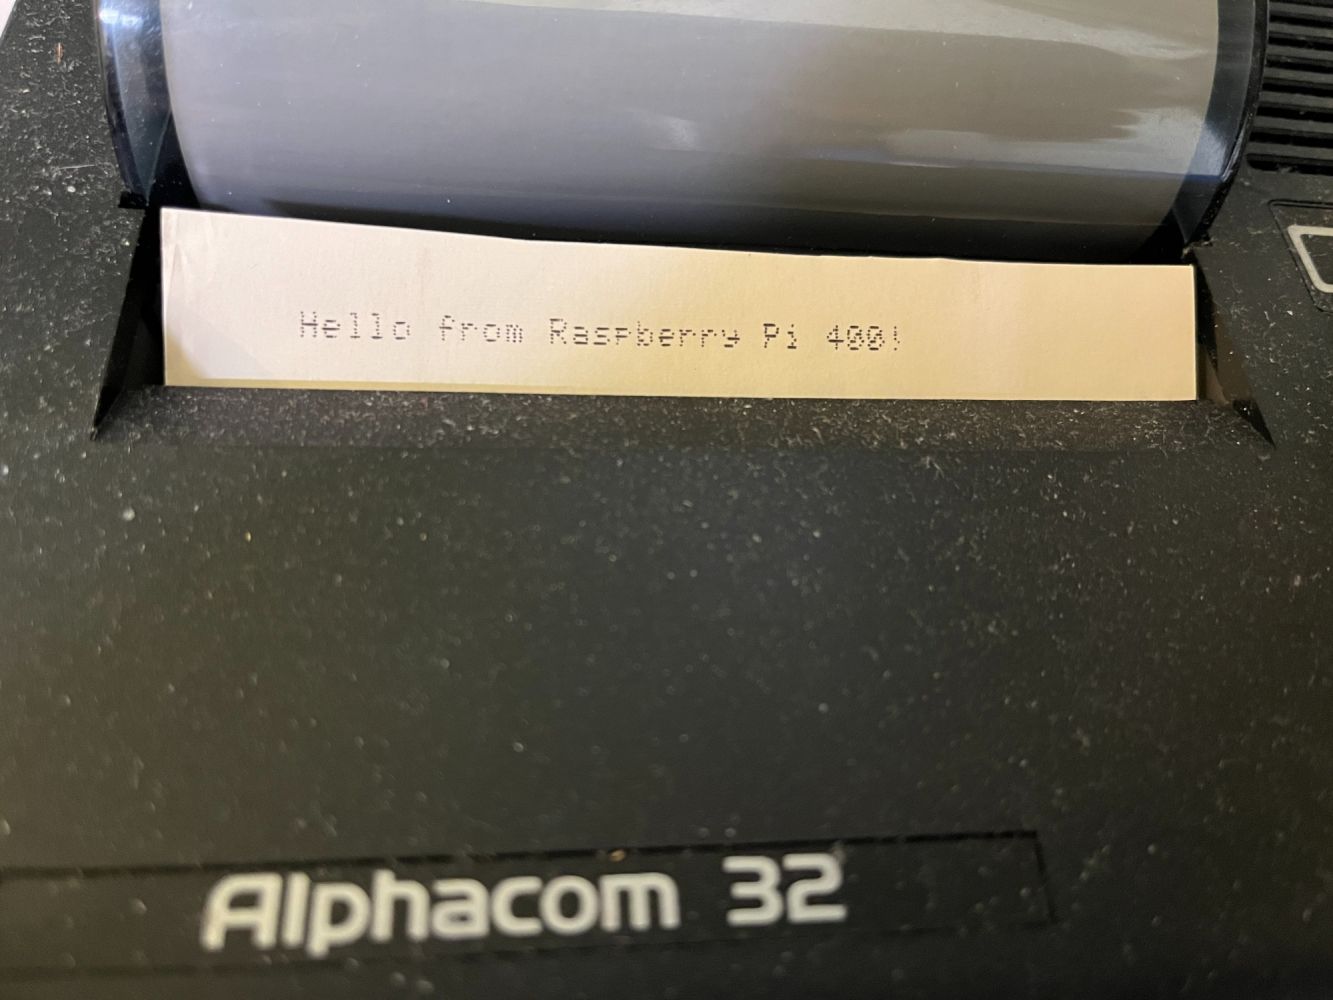
4. to print a text file. In a terminal...
- Enter "lp [filename]" where [filename] is the text file to print
*/
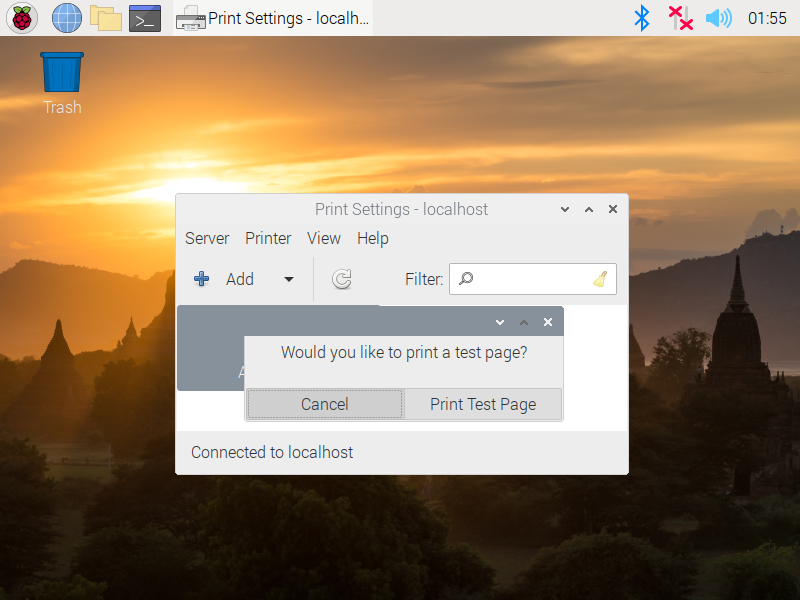
The following is a slide show of screen captures you get following the above Raspberry Pi serial port configuration instructions .


To create a file in Linux using the cat command, you can use the following steps:
- Type
cat > - Type the name of the file you want to create
- Press Enter
- Type the text you want to add to the file
- Press Ctrl+D to save the file
For example, to create a file named
file1.txt, you would type cat > file1.txt.