THIS TOPIC IS UNDER CONSTRUCTION
( JAN 25 2025)
Windows 10 Printing
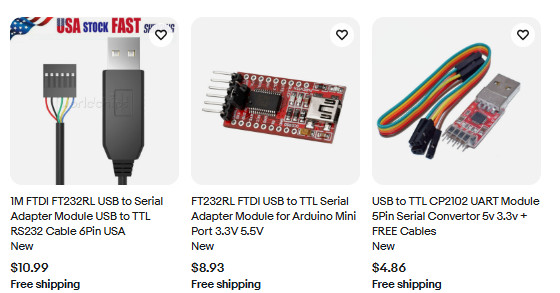
A sampling of FTDI modules selling on ebay.
FTDI FT232RL USB to Serial Adapter Module USB to TTL RS232 Cable 6Pin
The ebay ad has a good description of this product
 |
|
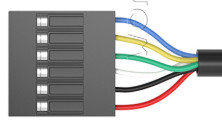 |
Red wire: 5V Black wire: GND White wire: RXD Green wire: TXD Yellow wire: RTS Blue wire: CTS |
|
|
FTDI BOARD ZXPS Serial Connector |
| https://www.ebay.com/itm/314750094499 | $1.17 |
https://www.ebay.com/itm/326276716709
WINDOWS 10
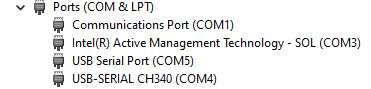
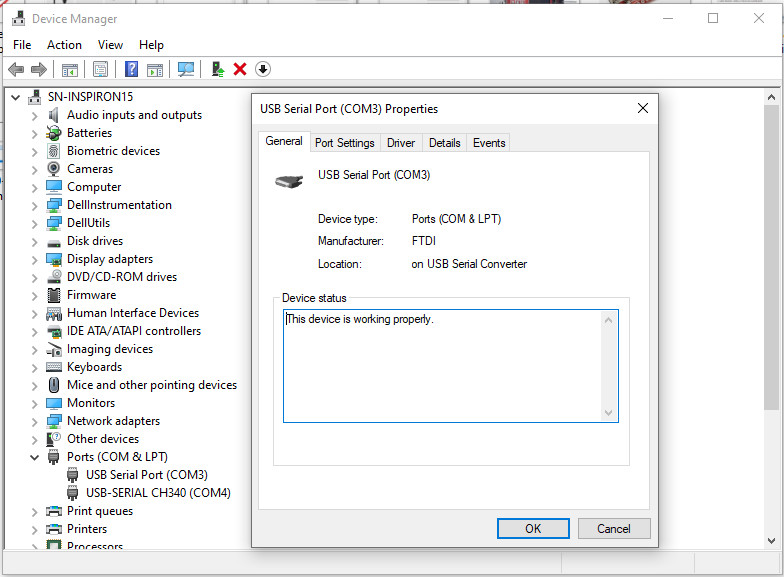
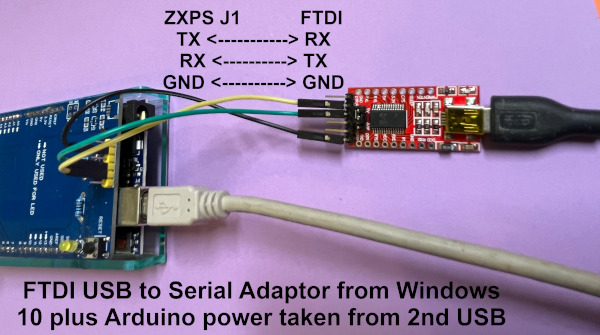
In the above example the FTDI USB to Serial interface cable is on COM3 and an Arduino UNO clone is on COM4
| Ports | Signal |
| COM3 | FTDI USB to Serial Interface Cable |
| COM4 | Arduino USB Cabale ( communicates and supplies power ) |
Port and Power Considerations
The Arduino needs to get power. It can get that from a USB cable to a computer port as above. But once the software is downloaded to the Arduino, it no longer needs to connected to a computer. It is also possible to power the Arduino from a USB power pack or from a 9VD power adapter.
NOTE: If the Arduino is powered with a USB cable to the same computer that the FTDI cable is connected to then the FTDI GND connection can be eliminated. (?)
BELOW: The comments reprinted from the Github text_printer.ino Arduino sketch for configuring a Windows 10 printer port.
The file gets installed in Arduino/libraries/ZXPrinterLibrary-main/examples/text_printer/text_printer.ino
/*
Emulates a serial text printer so you can print from a modern Operating System.
This example has been tested on:
- Windows 10 using an FTDI usb->serial adapter
- Raspberry Pi 400 running Raspian Bullseye using serial on the GPIO connector
Flow control:
As printing is quite slow the Arduino must occasionally pause the incoming serial data while
it prints a line. This pausing is called flow control. If we didn't flow control then some
printout would be lost. There are two types of flow control, hardware and software.
NOTE:
- You can't use the Arduino USB serial port as the serial driver doesn't support flow control
- Not all usb->serial adapters support flow control, and some only support hardware flow control
Steps to using this example:
On Windows:
1. plug the usb->serial adapter into the serial header of the ZXPS shield
make sure you connect the adapter in the right way up, lining up the tx->rx and rx->tx pins
2. connect the usb from the adapter to your computer taking note of the serial port of the adapter
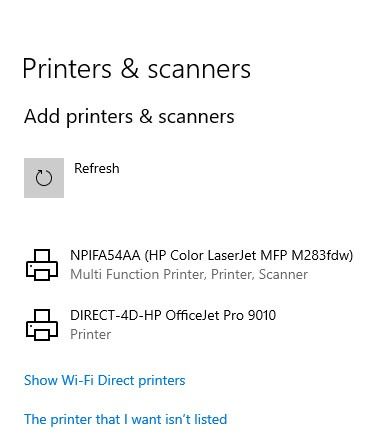
3. configure a serial text printer on the serial port, for example in Windows 10
in "Printers & Scanners"
- click "Add a printer or scanner"
- click "The printer that I want isn't listed"
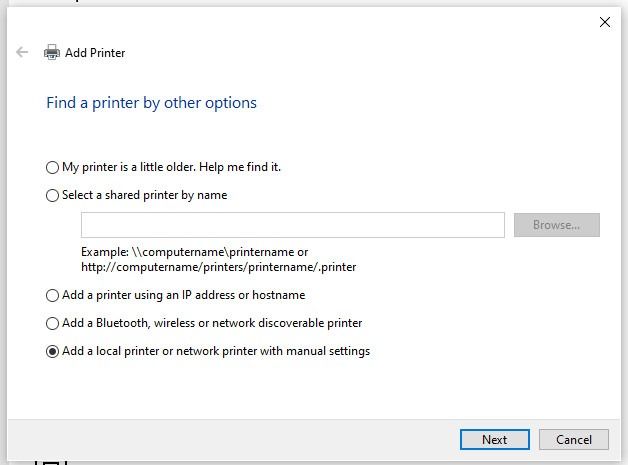
- select "Add a local printer or network printer with manual settings" then click "Next"
- click "Use an existing port"
- select the serial port with the usb->serial adapter then click "Next"
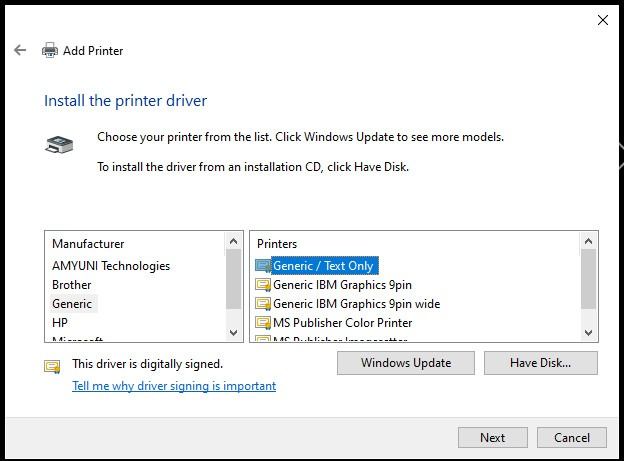
- select "Generic"->"Generic / Text Only" then click "Next"
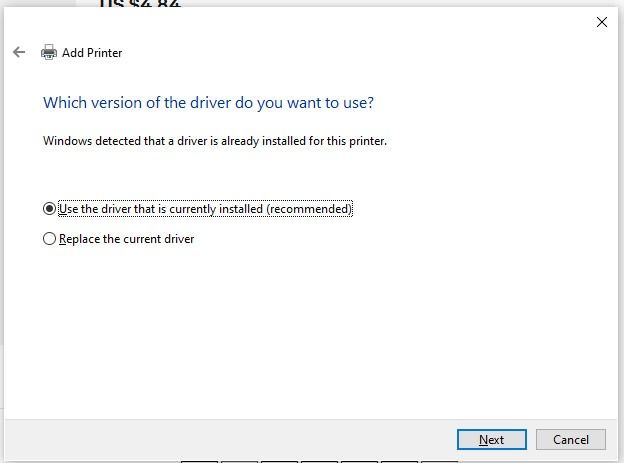
- select "Use the driver that is currently installed" then click "Next"
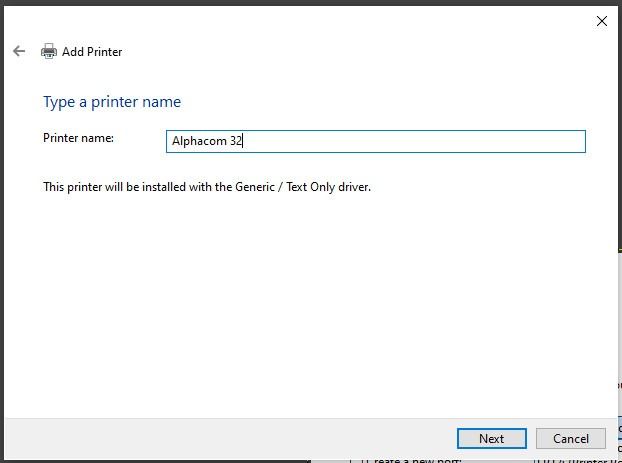
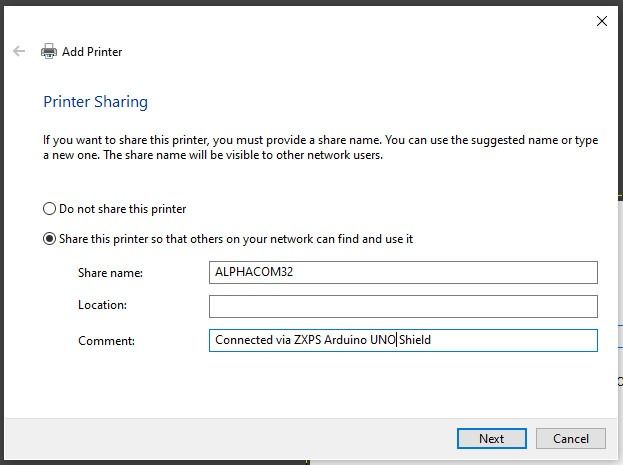
- enter a "Printer name" then click "Next"
- share the printer if you like
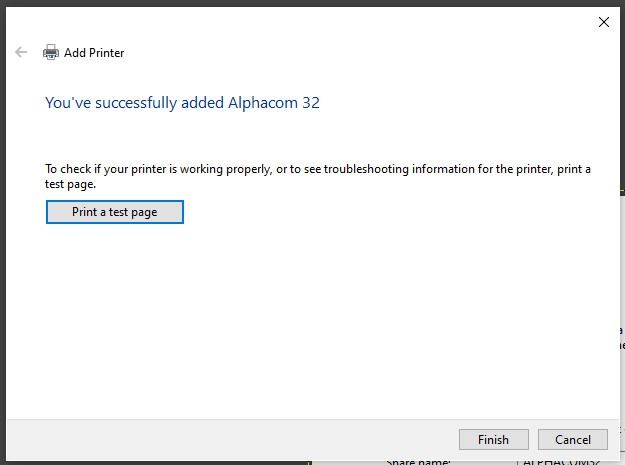
- click "Finish"
- in "Printers & Scanners" select the new printer then click "Manage"
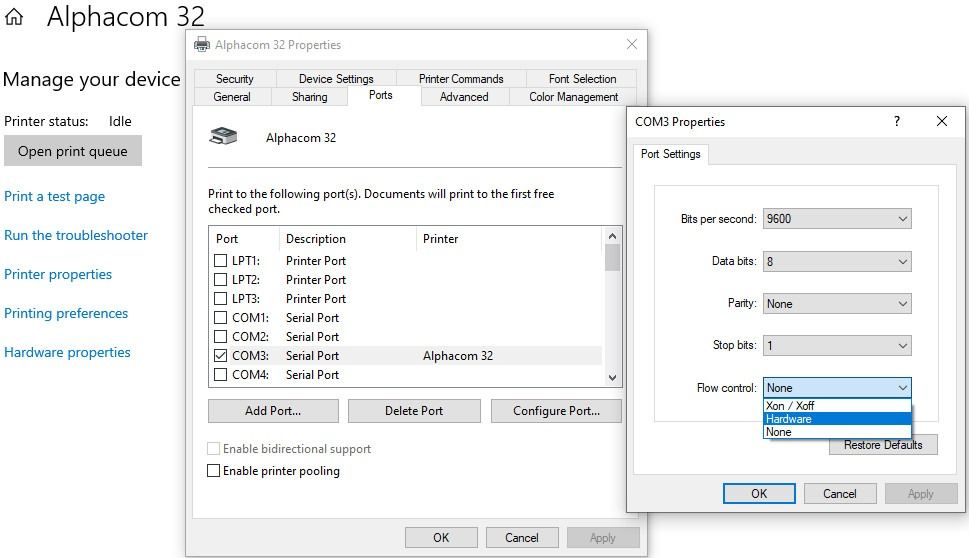
- click "Printer properties"
- click the "Ports" tab
- click "Configure Port"
- for "Bits per second" select "9600"
- for "Flow control" select "Xon / Xoff"
- click "OK"
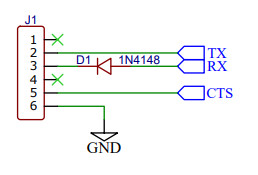
NOTE: The configuration steps above assume software flow control (XON/XOFF), but the code also
supports hardware flow control (RTS/CTS). However, in the Windows port configuration, hardware
flow control requires both CTS and DSR. So, if you want to use hardware flow control you will
need to connect these two control signals together on your usb->serial adapter. This may not
be possible as not all usb->serial adapters break out both the CTS and the DSR control signals.


